Showing posts with label DIY Beauty. Show all posts

Jan 12, 2018

DIY Beauty Fridays: 8 Beauty Tips for Exterminating Zits

It seems that the older I get, the more I breakout. 

I don't get it - I thought that the older you get, the nicer your skin would be.  It appears to have gone in the opposite direction for me. 

I stumbled on this COOL pop-up art on Pinterest for exterminating zits and knew I had to share it with you all.  ENJOY.

Picture found on Pinterest.  Website link is https://thesecretyumiverse.wonderhowto.com/
What are your favorite DIY pimple remedies?  Anything I should be trying?

Happy Friday Glossers.

Jan 5, 2018

DIY Beauty Fridays: Coconut Oil and Your Dry Winter Skin


Image result for calgary cold
Calgary in the wintertime - SO COLD!!
Since moving from BC to Alberta, my skin has taken a beating.  It's dry, flaky (sometimes) and I even get these little dry patches if I forget to moisturize one day.  It's a huge change to the dampness of the Lower Mainland - I can't get over how dry it is here!

I know that it will take some time to adjust to my new climate here but in the meantime, I am so thankful that coconut oil is readily available.  For those that aren't aware, coconut oil is a miracle in a jar.  Truly - it will save your life!!  (Maybe that's a slight exaggeration but still...)

Here are some of my top, favorite, uses for coconut oil:

Image result for coconut oil
1.  Shiny Hair - run a pea-size amount through your wet hair, after shampooing, and your hair will be so shiny and moisturized.

2.  Moisturizer - Dab some coconut oil on your dry spots (or all over to fully moisturize) and your skin will be dewy, full of life and those dry patches will be gone.

3.  Makeup Remover - Put some coconut oil on a cloth or cotton pad and swipe over your face and eyes to remove all your makeup.  Truly, this works wonders.

4.  Toothpaste - Mix some coconut oil with baking soda and brush away.  I've used this a couple times and it does your teeth clean but I miss the minty flavor of my usual toothpaste.

5. Lip Balm - use a bit, similar to a Vaseline, on your lips if they are super dry.  Leave overnight and your lips will feel completely transformed.

What are your favorite uses for coconut oil?  Anything I may have missed from the list?

Happy Friday Glossers.

Dec 27, 2016

DIY Facial Oil - Only 3 Ingredients Needed!


So you all know that I typically post DIY beauty tips on Fridays and I also ALWAYS try them before I post.  However, this one was way too good not to post today and I am in the process of making it.

I adore facial oils.  Truly, I don't think there is a better way to keep your skin moisturized and make your skin more supple.  I recommend oils to everyone I know because they actually work and do exactly what they say they are going to.

What I don't like about the oils on the market is the pricetag.  An ounce of facial oil can set you back about $100 and, though  there are some fantastic oils on the market, the investment is just not worth it.  Especially when you can make your own for less than $20.

I found this site today and had to share - check out the post and let me know if you end up making this as well.  I can't wait to hear your results after using your DIY facial oil!

http://www.mrshappyhomemaker.com/diy-face-oil/


Apr 1, 2016

DIY Beauty Fridays: Uses for Q-Tips You'll Wish You Thought of Yourself


I am currently in travel mode, again.  We are going to be flying to Toronto next Thursday to introduce the Little Man to some of Allan's family.

Hence why I've been posting about travel makeup bags, etc.  I love packing for travel, especially my makeup, BUT I always find that I run out of room before everything I need is packed.  Yes, I know they make those little clear makeup containers for a reason but truly, they are so small, finicky and the leak.

That's why I am always on the hunt for new ways to pack my products using the smallest amount of space possible.  The answer: Q-tips!

Awesome Uses for Q-Tips


1.  Q-Tip Perfume Swabs
Seriously, packing a huge bottle of fragrance is completely impractical.  Spray your favorite scent on some Q-tips and touch up when you're out and about.

2.  Pop pimples with Q-Tips
We all love to squeeze pimples though we do this knowing they can scar.  After a hot shower, when you're skin is still warm, take two Q-tips and press on either side of the pimple and push lightly together.  The pimple will pop, you can easily clean up the mess AND no scarring.  Win-win

3.  Remove puffy eyes with Q-Tips
Place some eye cream in the ends of Q-tips, place in a ziploc bag and freeze them overnight.  In the AM, use the coated Q-tips underneath your eyes to remove bags and look awake!

4. Coated Q-Tip Eye Shadow Sticks 
Coat either end of a Q-tip with your favorite eye shadows, store in a ziploc bag and use when traveling.  Saves the hassle of packing a huge palette!

I know I will be saving a lot of room using these tips.  Anything you think I've missed?


Feb 26, 2016

DIY Beauty Fridays: Homemade Toners for All Skin Types


In sticking with the toner discussion from earlier this week, I thought it'd be cool to make our own toner in case you don't want to spend the money on store brands AND also use something on your skin that's pure.

I mentioned in my other post the amazing benefits of using toner and what type of toner you should be using based on your skin concerns.  The same would go with making a toner - remember to narrow it down to your skin type.

Homemade Toner for Oily or Acne Prone Skin

3/4 cup steeped green tea 
1/4 cup apple cider vinegar

After steeping the tea in hot water, let rest until the tea is room temperature, then discard the tea bag.  Add in the apple cider vinegar.  That's it!  You can either spritz on your cleansed face OR use with a cotton pad (which I recommend).  Store in a sealed container for no more than 10 days in the refrigerator.

Homemade Toner for Sensitive Skin

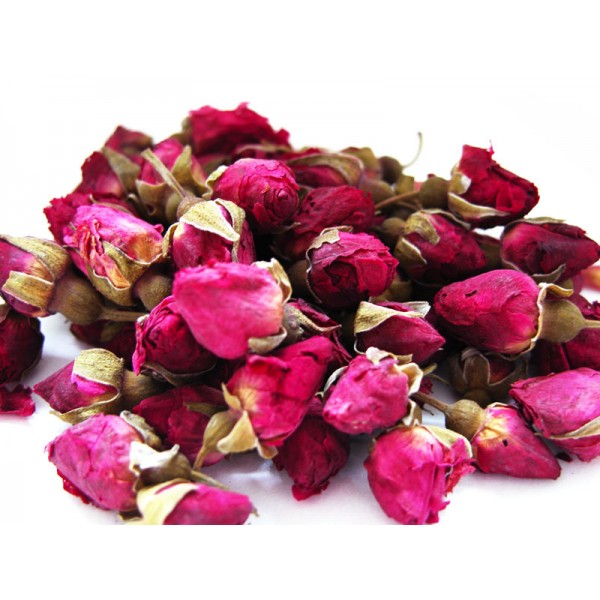
1/2 cup dried rose buds 
hot filtered water 

Pour the water over the rose buds and let the mixture sit for 1-2 hours.  Strain the liquid from the buds and you now have your rosewater.  Store in a sealed container, in the refrigerator, for no more than a week.  Again, you can spritz this on your cleansed face OR apply with a cotton pad.

Homemade Toner for Dry Skin

rosewater (using the above recipe)
geranium essential oil 

Once you've made the rosewater using the recipe above, add a few drops of the geranium essential oil.  That's it!  I really like this toner.  It's great for dry skin BUT I just adore the smell.  Store in a sealed container in the refrigerator for no longer than a week.  Apply by either spritzing or using a cotton pad.

I can't wait to hear what you think of the toners.  Let me know if you try the recipes out!

Happy Friday Glossers.


May 1, 2015

DIY Beauty Fridays: Homemade Stretch Mark Oil

Photo courtesy of  http://pregnancy.pregnantshop.info/tag/pregnant-belly
Being pregnant has, truly, opened up a whole new world to me.  Things I had never even thought of before are now ever-present in my mind  Of all the strange and new thoughts I have, the most interesting one is about stretch marks,

Now, first, let me begin by saying that stretch marks, when combined with pregnancy are a beautiful thing.  They signify your growing body to accommodate your growing baby and are truly a work of art.  On that note, I can STILL be slightly vain and say that I'd rather not have too many.

And I don't have any yet, which is great however, my body is almost at full capacity and I am moisturizing about 5 times a day.  I believe I owe this lack of stretch marks to a little miracle home remedy I've been using for quite some time.


Homemade Stretch Mark Oil 

1 cup olive oil (EVOO is the best)
1 cup aloe vera gel (not picky on brand but try to find a relatively pure one)
8 vitamin E capsules 

Mix first two ingredients together and, once mixed, pop the vitamin E capsules and drain into mixture.  Mix well.  Store in sealed container, in the fridge, for a nice cool gel.  Apply liberally to stomach, hips and thighs.

Seriously, this stuff is amazing.  I do recommend you try this out as both vitamin E and aloe are great for reducing redness from already existing stretch marks.

Happy Friday ladies!


Mar 27, 2015

DIY Beauty Fridays: Homemade Bath Salts


Sigh, I miss hot baths more than I can explain.

I know I can still have baths but they have to be lukewarm, warm at best, and I do miss the scalding hot water, sweating away, while the bathroom steams up and I can barely see in front of me.

One thing that hasn't changed, despite the water temperature, is my fascination with bath salts.  I am usually the first to seek out these relaxing bath additions that come in a multitude of scents and textures.  What's even better than being able to buy them is to make your own!!


Homemade Lavender (or any scent) Bath Salts 

3/4 cup Sea Salt
1/4 cup, plus 2 TBSP, Epsom Salts
2 TBSP Baking Soda
A couple drops of your favorite essential oil (Lavender, Rose, etc)
Food coloring if you want to store it and look pretty

Place all the dry ingredients in a bowl and mix together.  Add the essential oil and food coloring (if you'd like) and stir until evenly distributed.  Place contents in a mason jar to store in the bathroom.  Pour into your bathwater and soak to your heart's content!!

Okay, it's Friday and I am so going to go and have a bath now.  Happy Friday ladies!


Mar 6, 2015

DIY Beauty Fridays: Homemade Eye Cream


I'm at an age where eye cream is an absolute must in your skin care routine!

I did start using an eye cream a long time ago but I do think that starting early and continuing daily use, has made my skin look young and feel firm.  If you haven't started using an eye cream, DO IT and NOW, especially since you can make your own for next to nothing!!


Homemade Anti-Aging Eye Cream

1/2 cup organic coconut oil 
6 - 8 Vitamin E capsules 
Needle to poke the Vitamin E capsules
Microwaveable bowl 
Small container for finished product

Place the coconut oil in the microwaveable bowl and place in microwave for 15 seconds OR heat in small saucepan over the stove until oil is in liquid form.  Pour the liquid oil into the small container.  Poke the Vitamin E capsules with the needle and squeeze product into the container with the oil.  Mix together and place in refrigerator for an hour until oil returns to solid state.  Remove from the fridge.  Use once a day (in the evenings) by dabbing a small amount around the eye area.

Easy, right??  Not only are you saving tons of money BUT your skin is reaping the benefits of the Vitamin E.  Trust me, you will love this stuff.

Happy Friday ladies!


Feb 20, 2015

DIY Beauty Fridays: Homemade Lemon and Coconut Oil Face and Body Moisturizer


There is something so refreshing about making your own beauty products.  As of late, I haven't had the same amount of time to do this BUT this recipe is my go-to when I am sitting around, doing nothing AND wanting to create something yummy.

Trust me, you will love this.


Lemon and Coconut Moisturizer

4 TBSP Coconut Oil (solid state only)
Juice of two lemons

Place solid state coconut oil into a bowl and add the juice of the two lemons.  Use a hand mixer to whip the two ingredients together for 5 - 6 minutes.  (Timing is very important).  *Note, if your coconut oil is in liquid form this will not work.  Place the oil in the freezer until it's solid and then take it out and use it right away.*  Once everything has been whipped together, add to a container and store in the fridge.  Use on body and/or face.

THAT'S IT!  How easy is that, right?  You can add anything from lavender to vitamin E oil and even vanilla extract.  I like the lemon scent though.

Try it out and let me know your thoughts!!


Jan 16, 2015

DIY Beauty Fridays: 8 Home Remedies That Will Banish Dark Circles

Dark circles just won't go away???
Dark circles can creep up at anytime.

Maybe you haven't slept in a few days or maybe it's hereditary.  Either way, those pesky dark circles can make it so your makeup never looks quite right, despite using as much concealer as you possibly can.

Potatoes, cucumber slices or cold tea bags are the most common home remedies as the coolness shocks the skin but they also all contain an ingredient that soothes and calms the eye area.

Check out this handy guide for more home remedies to banish those dark circles.


What are some of your favorite home remedies??  What has been working for you?


Dec 19, 2014

DIY Beauty Fridays: A Coconut Oil How-To

I have become something of a Pinterest junkie.

I truly had no idea how many great things people are "pinning."  It's still a fairly new concept to me but, man, there are so many cool treasures you can find.

Like today's DIY beauty post, for example.  This amazing how-to guide was found on Pinterest but comes from an interesting site called Health Perch.  Full credit goes to them for posting this amazing guide about coconut oil and all it's uses.

Check this out.  You will be occupied making beauty products for DAYS!!


Happy Friday Ladies!


Dec 12, 2014

DIY Beauty Fridays: Homemade Relaxing Muscle Oil


I'm sore all the time.  This is truly something I've learned while pregnant.

I mean I am a very active person and work out a lot so sore muscles are not new to me however, being pregnant makes you feel like you have sore muscles without working out.  Seriously, my hips are getting wider, my knees ache in the morning and my back is always throbbing.

I've been told this soreness will pass BUT in the meantime, I need something to help with the achiness.


Homemade Relaxing Muscle Oil

2 cups almond or olive oil
2 TBSP dried coarsely ground ginger
24 drops eucalyptus oil

Place oil and ginger in a slow cooker for about 6 hours.  (if you don't have one, use a saucepan on very low heat).  Turn off heat and let cool.  Strain through a cheese cloth and add in oil once strained.  Use on sore body.  (Store in a cool place).

This is great stuff.  I've used this a few times in my life and it always made me feel. I will definitely be making a batch of this tomorrow.


Dec 5, 2014

DIY Beauty Fridays: Body Pimples and Aspirin


I've posted about the miracle of aspirin on pimples before but bringing this up again because I am breaking out.....on my back.

Pregnancy makes things go haywire.  The added hormones coursing through your body has different effects on everyone and, for me, I get pimples on my back or other odd areas.

I pulled the aspirin trick out, to hopefully rectify this little "pimple problem."  For those that didn't know, aspirin works wonders on drying a pimple out and literally reduces the size tenfold, without having to pop it which causes scarring.


Aspirin Trick for Pimples

1 uncoated aspirin
2 drops of water

Let the aspirin dissolve in the water mixture, or if antsy, crush the aspirin slightly, add the water and make a paste.  Apply to clean skin and only on the affected areas.  Let dry 10 - 15 minutes and wash off with a clean warm washcloth.  Immediately apply moisturizer to the area.  Go to bed and wake up with a very small red dot!!

This trick is used all over the world and truly works.  I highly recommend you trying it.  For those that have already, what did you think?


Nov 21, 2014

DIY Beauty Fridays: Homemade Lavender Foot Soak

Photo courtesy of Spa Around the World
I knew when I got pregnant that I would most likely be sick, nauseous and very tired.  And I have been all of these, though less so now as I move into my second trimester.

Instead, i'm now dealing with sore feet.  All the time!

Today for example.  I am sitting at my desk working away, wearing my favorite brown boots and stretching my feet underneath my desk.  I don't know if I stretched my foot the wrong or am just falling apart BUT my right foot cracked in the most hideous way and I am now completely swollen.

Now, you are probably saying that this has nothing to do with being pregnant however, this weird muscle cramp snap thing has never occurred before so yes, I am blaming little bean for this...ha.

On that note, I see a much needed luxurious foot soak in my future....


Lavender Foot Soak 

You will need:
4-5 liters of water
A few drops of lavender essential oil
1/4 cup epsom salt

Boil the water and, once boiled, let it cool down to a comfortable temperature for your tootsies.  Add the lavender and salt, stirring gently.  Put your feet in the mixture and enjoy!

Nothing makes me feel better than a foot soak.  Especially after a long, hard week at both work and the gym.  Enjoy, ladies, and Happy Friday!


Nov 14, 2014

DIY Beauty Fridays: Cleaning Your Makeup Brushes with Household Goodies

Photo courtesy of brebeauty
Ever wondered why your one little-itty-bitty pimple spreads to all corners of your face?

It's a little thing called bacteria.  And the most used product that carries the majority of this nasty bacteria is your makeup brushes.

Your dirty makeup brushes are giving you pimples!!!!

Gross right.  What's worse is that I am a TERRIBLE culprit of not cleaning my brushes.  Honestly, I would rather buy new ones than clean my brushes.  However, now that I can easily do this at home using everyday household goodies, I am going to become BETTER at cleaning my brushes and allowing my face to be bacteria-free.

Photo courtesy of Wikihow
You will need:
Olive oil
Liquid dish soap
Warm water
Vinegar
Hand towel

Dab a bit of olive oil on a towel and swirl the tips of your brushes into the oil.  Blot the excess off on the opposite side of the towel.  Mix together some warm water and the liquid dish soap and wash your makeup brushes in the mixture (get your fingers in there and clean the bristles), being careful to avoid the "stem" (where the brushes are connected to the handle).  Dip the bristles into some white vinegar a couple of times and rinse the vinegar off, vigorously, with warm water.  Let air dry.

As I'm writing this, I realize there is NO EXCUSE for me not to clean my brushes.  I guess I have a date with my makeup brushes tonight.

I would love to know your thoughts on this as well should you try it out.

Jun 14, 2013

DIY Beauty Fridays: Homemade Salt Spray For Your Hair


Just got in the door after working out.  Still wavy!
My hair is getting really really really long. In fact, I haven't even had a trim since the before the wedding (can we say split ends!!!) However, since my hair is extremely thick, coarse, wavy and has a mind of it's own, I knew I'd have to find a simple way to style it for our trip.

For those of you that don't know, Allan and I are going backpacking for three months to Southeast Asia.  In fact, we leave on November 30 at 11:00am.  (And yes, I am counting the seconds too!  Ha)  Since I am only bringing one backpack for 90 days, I know there is no way I can pack my hair straightener, blow drier, curling iron, pomade, Moroccan oil, hair spray, hair treatments.......catch my drift?  25 pounds is the max I can carry for days on end and none of the products above are a necessity at this point.  Hence my desire to find one product I can spray on that will leave my hair looking pretty great AND is easy to carry.  Whew.

Excited by my waves
Sea Salt Spray it is ladies!  I have been reading so much about this spray ( like the Bumble and Bumble brand) but have been willing to fork out the money.  So, I made my own last night.

Beachy Waves via Salt Spray

1 cup distilled water, warm
2 teaspoons coarse sea salt or Epsom salts (I used a bit more than 2 tsp as my hair is super thick)
1 tsp hair gel (I used Frizz-Ease brand)
1/2 tsp leave-in conditioner
4-5 drops of coconut, argan or Moroccan oil (whichever is your preference)

Combine all ingredients and place in a spray bottle.  Wash or wet hair and spray immediately on to towel dried hair.  Spray onto sections, focusing on the roots.  Scrunch from the bottom up to the root to activate natural wave or curl.  You don't have to use the whole amount; stop when hair is saturated enough.  **TIP: Do not comb or brush your hair after you have towel dried your hair.  The purpose of this product is to enable your natural curl or wave to come out and be more prominent.**

I let me hair dry for about an hour then applied some more spray, scrunching again, and slept on my hair.  I woke up to a mound of curls.  I have been wearing this style all day AND just got home from the gym and my hair is still wavy.  I am absolutely making a batch of this before the trip.

Have you ever used a salt spray before?  What are your thoughts?

Happy Friday ladies


Jan 25, 2013

DIY Beauty Fridays: Soft Hair with Baby Food

Photo courtesy of www.organicforlife.co
Sometimes, I surprise even myself when I discover new items you can use to make yourself gorgeous. Like today, for example. Who knew you could have that soft, flowing hair you've always wanted just by using baby food?

I don't know about your hair but mine, during the winter months, is almost unmanageable.  Seriously, it's dry, frizzy and only looks half-ways decent if pulled into a messy bun.  I have always envied those girls who have beautiful, silky tresses, even when standing in a wind/rain storm.  Grrrrr

In fact, one of my friends, has the most gorgeous hair I've ever seen.  She claims her hair has split ends and looks dreadful if she stands in the wind BUT let's be honest, I have never seen her hair out of place EVER.  (Oh, Rheanna, I wish I had your hair.)

However, since I don't, I need to use products, even baby food, to achieve it.

Deep Conditioning with Baby Food 

Photo courtesy of www.creativeuncut.com

You'll need:

One jar organic banana flavored baby food 
Extra-virgin olive oil 
Honey

Mix ingredients together in a small mixing bowl.  The key to this is to use slightly more honey than oil.  (The consistency should resemble oatmeal.)  Apply to clean, wet hair and leave on for 15 minutes.  Rinse out very well.

You will adore your hair after this treatment.  Honestly, your hair will be so shiny and manageable, you'll want to use this mix all the time!  Let me know what you think of the treatment of you do try it out.

Happy Friday!


 photo copyright.jpg
envye template.