Showing posts with label product review. Show all posts

Mar 21, 2018

ISH Statement Lip Palette - Review and Swatches


As most of us beauty junkies know, lip palettes are a bad investment.


Usually, the included colors are colors that wouldn't sell as a single tube of lipstick or gloss and typically the product formulation is less than stellar.  I have tried many a lip palettes in my past, always going in with the best intentions, but realize after one application that they are too tacky, too sticky, too orange and all-around a bad idea.

Until I met this one, I had labelled all lip palettes the same.  However, I am very impressed with the colors, the application and the longevity of the ISH Statement Lip Palette.


Let's chat colors.  On first impression, I was excited to see nude shades in palette as well as more reds than pinks.  The best part of this palette - the nude shades are actually nude and NOT orange.  I also love that each one can be mixed together to create your own unique shades.  Also included in the palette is a tinted lip topper to give your lips a hint of sheen should you like that glossy look.


Here are the colors from left to right (top row; excluding the first shade which is a tinted lip topper).


Middle row from left to right.  Check out how gorgeous these pink shades are!


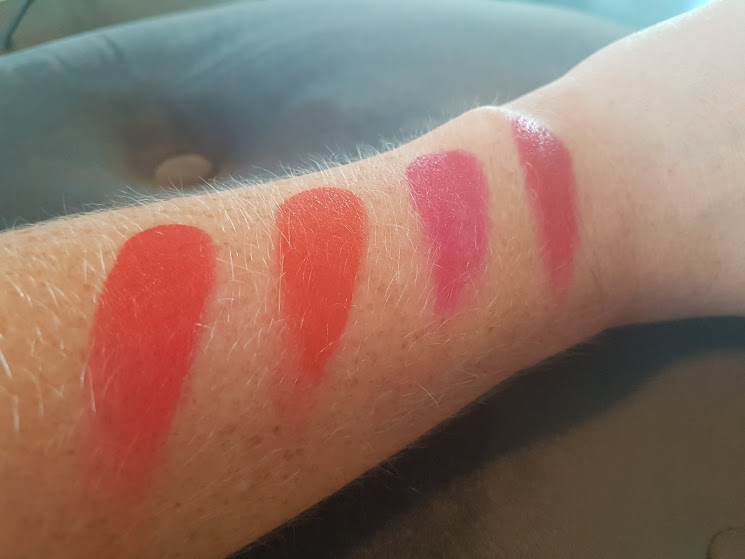
Bottom row from left to right.  I am LOVING the last berry color.


I am really impressed with how fantastic the last nude color (in the top row) is.  I have it on here and it's almost as if this nude shade was made for my skin tone.  I am absolutely loving it.  I will also say that it went on very easily, is super pigmented and the colors blend well, as I moved on to the berry shade after this.


I didn't take off the nude shade prior to applying the berry color (last color in the bottom row) but still the pigment is amazing.  Perfect color for my skin tone and definitely easy to apply.

I am thrilled with this palette and will now eat my words about lip palettes.  Ha


Jul 29, 2010

Tanning Oil and Sunscreen: A Debate

I was taking part in an "Amazing Race" like event last Saturday with a couple of my close friends. My partner in the race, and very good friend, was lubing (Ha...sorry Carmen) herself up with her "all-natural" tanning oil whereas I was slapping on the 30 SPF sunscreen. Let me first say that Carmen is the only natural blonde I know that doesn't burn. (Trust me, it makes me nauseous too.) Because she never burns, she was laughing at me and my OUTSTANDING relationship with the sun. Needless to say, she and I started to disagree about which product is better for you; Carmen taking the side of the oil and me, sticking with my trusty sunscreen.

Neat thing for me is that I get to post my opinions online. (YAY for blogging.)

Tanning Oils are mainly made with a base of Sunflower Oil and/or Coconut Oil. From there, other products are added like almond oil, cocoa butter, lanolin and eucalyptus oil. These products are what gives the skin a moisturized look and feel. Also, vitamins A, D and E are typically added and are very effective in treating dry and weathered skin. There are undeniable advantages of using tanning oil such as the amount of moisture your skin gets to the deep color of your tan.....this is where it gets a bit tricky. See, tanning oil intensifies the amount of ultraviolet light that reaches your skin, thus giving you a deeper, darker tan in way less time which means there is nothing that protects your skin from the UVA/UVB rays. Yes, some tanning oils promote an SPF 4 or 8 but this protection is almost too low to prevent anything. Plus, having an SPF added is almost counterproductive as oils promote tanning.

Sunscreens are, quite simply, the polar opposite of tanning oils. It was designed to absorb and reflect the UV rays which, as we all know, helps to prevent sunburns. (UV Light also triggers overproduction of melanin, which can be seen in the darker spots on the skin...aka freckles, moles, etc.) To make a long story short, about 90% of aged skin and wrinkles are caused by the sun's rays. SPF prevents those harmful rays from seeping into the skin which means a more youthful look for longer.

A lot of times people think that if they can't see skin damage it's not there which is definitely not the case. Most of the damage we are doing to our skin will not show up for 20 years.....SO, ladies, slap on the sunscreen. Remember, sunscreen is only preventing the damaging effects and will still allow you to get tanned.

Oh, one more thing, look for a sunscreen that contains titanium dioxide. (This pigment absorbs the UV light very quickly!) I highly recommend Clinque's Super City Block as it has titanium dioxide AND has an SPF of either 25 or 40.

Jul 26, 2010

Renate's Faves for our Curly Haired Friends


How lucky am I, hey? My friends are so great that THEY want to write instead of me. I am definitely going to milk this for as long as possible.....Today, Renate is writing on products for our curly-haired friends. Read on product junkies.....

Hello ladies with curly hair!!

I know it can be difficult to tame those luscious locks , but fear not. Over the years, I have had a lot of clients with natural curly and wavy hair. My absolute favourite product to use is the TIGI Catwalk Curls Rock Amplifier Cream; this amazing product defines and seperates curls for you. You can use it alone for precise control or amplify with defining serum for feather light hold and waves. It can also be used on dry ends to de-frizz those unruly curls. A little goes a long way with this product, so one pump is usually all you need! (Note: This product works wonders if used on wet hair so once you've towel dried your hair, put this baby in!)

If you're looking for a product with a stronger hold without the wet look of a gel, try the lightweight mousse in the Curlesque Collection. This wonderful product has deep sea extracts of kelp, fennel, and seaweed which assist in smoothing the cuticle on demand for a frizz-free finish with light hold and amazing shine. I also recommend some great layers for curly hair! Don't be scared of putting in a few layers to help pump up those gorgeous curls. Just make sure your stylist knows how to properly texturize those layers ladies, we definitely don't want you walking out with a mushroom head!!!! And last, but not least, if you have a slight curl and are not quite sure how to make them bounce, I recommend investing in a universal diffuser. This awesome tool just slips on to the end of your blowdryer. After use, you will have amazing lift and curl in virtually no time at all! ............Renate


Jul 23, 2010

Guest Blog from the Smashing Ariella

I love guest blogs....it's so great to learn from others who have experience in so many different areas. My good friend Ariella is a phenomenal make-up artist who has amazing experience with cosmetics as well as application tips. (As well as secrets of the trade.) So, here she is......


My fabulous friend Christina asked me to let you guys in on a couple tricks of the trade. Being a make-up artist and a lover of all things natural, I have had the pleasure of trying out many products and have dabbled in creating my own concoctions.


1. Brushes. I am a firm believer in having great brushes. They allow you to apply your make-up better and are reusable (aka better for the environment). My two favourite brush lines are Quo(Shoppers Drug Mart Brand) and EcoTools (Alicia Silverstone’s Line). Both are inexpensive and durable. *Another great solution to make-up brushes are art brushes; some of my longest lasting and personal favourites are from my art store days. They are usually less expensive and just as effective. Another great note about brushes is this…Clean them! It’s important to keep your tools clean and sanitary. I can’t tell you how many make-up bags I have looked into that give me the creeps. I personally don’t bother with expensive brush cleaner since some 70% or 99% alcohol (and a shampoo every once in a while) will keep them as good as new.

2. Home-Made Scrubs. I don’t know about you, but I love a good scrub! I often make my own face and body scrubs because I haven’t found one that I love as much as the ones I make myself. Cetaphil and baking soda make a great daily exfoliating cleanser, while brown sugar is a great body scrub. That’s right, just some brown sugar (white sugar if you prefer a coarser scrub) and go to town with damp hands. Yes, it will start to melt, but no worries there as you'll taste nice and sweet.

3. Eye Liner. This is the topic I get asked about the most: How to apply liquid liner? How to get a straight line? Christina and I are hoping to make some how-to videos this summer to better illustrate some techniques, but in the meantime let me share a couple of points with you.


  • Liquid Liner - just because it comes with an applicator, doesn’t mean you have to use it! Use your favourite synthetic angled brush and it will give you more control.
  • Turn your favourite eye shadows into soft liners by dampening your brush before application.
  • Tight Liner – this is when you work eye shadow into the lash line from just below your lashes. It creates a fuller lash effect without looking like thick liner. (My daily wear.)
  • Practice – Liner isn’t easy and your eyelids aren’t carbon copies of each other which means you need to practice your application until you are at ease with it.

I would love to answer any of your questions as well so email cmwolthers@gmail.com should something pop into your head!

Jul 20, 2010

Wow, what a pimple!


I think I breakout more, now, than I did as a teenager. Don't get my wrong...I definitely had my intense pimple period in High School. You know what I mean, the big ones that appeared on your chin and forehead and ALWAYS before the day of something big like the dance, or a date, or, for me, a big dance competition. And, to make it way worse, the pimples were always HUGE. Seriously, ginormous. Big, red welts that looked like something bit you....

It's taken me a long time to understand the cycles and spurts of pimples but, for the first time, I finally got a handle on my breakouts. Here are some of the best (and worst) spot treatments....

1. Toothpaste. This is for my girls who don't want to spend too much money. Dab (and I seriously mean a dab) of toothpaste on the pimple before bed. Overnight, this will take away the redness and irritation. Now, having said this, it will not take away the pimple, since every zit has a cycle it needs to finish, but this will make it easier for concealer in the morning.
2. Moor Spa Blemish Gel. This is an amazing product. I was breaking out like crazy for a few months about two years ago and I lived on Moor Spa. ( I will be doing a post on cleansers so we'll talk about it then.) It's a gel, so applied sparingly to the problem areas overnight, followed by your moisturizer. Once used for a few days, you'll notice vast improvements.
3. Burt's Bees Herbal Blemish Stick. This is an odd product. I use it since Burt's Bees is my favorite product line BUT it really doesn't do too much. If you have recently scrubbed your face and apply this product over top, it will sting a bit, though it does go away. I use this overnight AFTER my night cream and it will take away redness. Oh, one other thing, it goes on like a roll-on lip gloss. Not very sanitary if you ask me, but it is a natural product.
4. Proactiv Refining Mask. Soooo, don't judge me for putting this on my list because it seriously does work. I dislike the entire proactiv line as it is very addictive for your skin and drying, BUT the mask is a dream. The tube, which is really small, can cost a pretty penny, but if used only as a spot treatment will last quite some time. Apply overnight to zit and it will be almost invisible the next morning. It works really well.
5. Clinique Acne Solutions Spot Treatment Gel. Whew, what a mouthful. It works; long and short of it. I have been a faithful Clinique user since my mom was their Rep and honestly, this product is great. Don't use too much as it can dry the skin around the pimple, but it works to reduce redness and irritation.

Give these a try and let me know your thoughts. Also, if you think of something that should be on the list that isn't, let me know that as well. I will be doing another blog about blemish prevention, as well as a post about cleaners for acneic skin. Ciao ladies...xox

Jul 19, 2010

Dial Up Mascara???


I was wandering through London Drugs Saturday afternoon and I, of course, beelined for the cosmetics area. Now, this trip wasn't like any other, since I was with a great friend of mine and we were both a bit tipsy from drinking on the patio. (Well, me more so than her...) I ended up buying a lot of things I didn't really need...aka three more lip glosses in Coral...BUT I found the product that's the basis for this review: Almay One Coat Dial Up Mascara

It's a brand new product, just launched in June, that actually has an adjustable base. The point of the dial is to customize the amount of lash coverage you want; a remarkable idea if you ask me.

So, does it work???

It's a chunky tube that actually compresses internally, thus giving the dialing effect. It has a thicker brush ( not your standard mascara wand) that does appear to evenly distribute the mascara. Level 1 gives a nice dusting of mascara but not very dramatic. Level 2, again, same as before but it goes on a bit thicker. Level 3 is the only level worth using as it gives full lashes but not the volume.

Would I use it again?

Though the idea of the mascara is smashing, I am not sold on the product. I love full, dramatic and voluptuous lashes and it didn't happen with this product. I, also, despise a mascara that makes my lashes hard to the touch. (This can cause lashes to break or fall out.) Having said this, I will definitely stick with my Estee Lauder or Lash Stiletto!

Let me know your thoughts though. I am always eager to hear what others think....

Jul 15, 2010

Guest Blog #1 - The Smashing Renate


Bonjour Product Fiends!!!

Here is the first of many guest blogs from my bestie, Renate, who is an amazing hair stylist. Feel free to email hair questions to her via cmwolthers@gmail.com as she will be doing a slot weekly... Now, without further adieu....

As a teenager, doing my hair, of course, was NOT at the top of my priority list. As most fine haired women, I battled with my hair from a very young age which meant usually just putting it up in one of those gramma clips... (no offense...but you know what I mean, grab twist clip.) Weren't they the highlight of the mid 90's !!

Until one day, I was introduced to the blow drier and round brush method! (Wow, I remember this day sooooooo clearly.) Not gonna lie, but learning how to use a round brush took a lot of patience, practice, and a few choice words that a lady shouldn't repeat!! Once I had that process perfected, I began to backcomb. (Seriously, the best thing ever!) I have used the same back combing method now for about 10 years , tweeking some parts of my daily routine of course, and introducing a flat iron definitely helped smooth those crazy fly aways.

We all want what we don't have: why wasn't I born with thick hair, curly hair, straight hair, or fine hair. Or why is it when I wear a ponytail all day, and then take it out, it has a horrendous bump? My fine haired ladies, have no fear!!! I have some great tips for you. I have learned that our type of hair holds great curl, unlike some other hair types, and it doesn't take much to make it straight because it already is. I guess my point is that I have straight, fine, lifeless hair. If I didn't use my volume spray on a daily, I would go as crazy as my hair. My recommendation for you is CHI volume spray. I use it on a regular basis and am absolutely in with love it. Its lightweight, and can be sprayed throughout the whole head for all around volume.

I don't know how many times I've been asked, "do you have a bumpit in your hair?" and my reply is always "no, hon, this is 10 years of practice" ........... Renate

 photo copyright.jpg
envye template.