Jan 31, 2012

Beauty Product of the Day: Indeed Nanoblur - Look 10 Years Younger in 40 Seconds

I seem to be completely taken aback lately by some of my recent purchases.  I don't know what it is but they've all turned out to be such a treat.  This one in particular...

My boss (at work) asked me over a month ago if I'd heard about this new-fangled product called Nanoblur.  I tried to pretend like I had but I honestly had never heard of it before.  She explained that this product is supposed to make you look "10 years younger in 40 seconds."  I don't need to look ten years younger just yet but I was intrigued all the same.  So intrigued that I rushed down to Shoppers Drug Mart and picked up a tube for myself.  (By the way, this miracle in a bottle is only $19.99 CAD.)

I want to share with you FIRST the directions from the back of the box.  "This product is based on advanced optics technology and is not makeup.  When using without makeup, apply Nanoblur as the last step in your regimen.  When using with liquid foundation, apply Nanoblur after applying your foundation.  When using with powder, apply Nanoblur before applying powder.  NOTE: if your skin is dry, you may wish to mix Nanoblur with your moisturizer."  Pretty heavy stuff I'd say.

My first encounter was actually slightly grim.  I used it, like the package said, after my liquid foundation and found that the product itself seemed to crumble off my skin.  So, the next day, I went without the liquid, applied it all over my face after moisturizer and dusted on some powder afterwards.  It was then that I noticed a HUGE difference.

My skin was completely matte and almost all of my minor lines, wrinkles (particularly in my forehead) and pores had disappeared.  I, of course, didn't believe it for a second so I tried it the next day and it was the same result.  It's been over a month and a half of me using this and I'm still amazed with the results.

Pros:
Makes your skin completely matte 
Almost all wrinkles and fine lines disappear
Dark circles under your eyes diminish
Reduces pore size
Does not make your skin oily at all 
Your skin looks flawless all day
Makeup adheres to the product very well
Fragrance-free
Reduces the appearance of sagging skin
Cons:
None, this cream is amazing

I can not stress enough how much every woman needs to own this product.  Should you not want to use it everyday, buy it for special occasions.  I have gotten so many compliments on my skin after using this product that I will never go back to using anything else.  Oh, and for only $19.99, you definitely can't go wrong.  It literally is a miracle in a bottle.

NOTE: I should say that I use a liquid concealer and will put this cream on PRIOR to applying my liquid concealer.  However, I have to apply the cream in small spots and then the concealer quickly as the product mattifies very fast.

Jan 30, 2012

FOTD: Dramatic Eyes For a Boudoir Photo Shoot

Saturday was such a fun, and nerve-wrecking, day for me.  It was the day of my boudoir photo shoot AND the day that my fabulous friend, Ariella (a makeup artist), showed me her amazing skills and did my makeup.

The day began with me arriving at her house in the morning with absolutely no makeup on or my hair done.  She got to work immediately and transformed me from plain-Jane to model fabulous.  After I finished doing my hair, the look was done.  Check out the before and after photos...

Good Morning!  It`s 10 am and I actually left the house without makeup OR my hair done.  Definitely a first for me
A couple hours and a delightful straightening job later, the look is complete.
Makeup used on my face:
Estee Lauder Idealist Pore Minimizing Skin Refinisher (primer)
Revlon Photoready Airbrush Mousse Makeup in 010 Vanilla
Youngblood Ultimate Concealer in Fair
Clinique Perfectly Real Compact Makeup in Shade 102 N
For the cheeks:
L'Oreal Magic Lumi Light Infusing Primer
GOSH Giant Sun Powder in 001
Physicians Formula Glow and Mood Boosting Blush in Natural 
Quo Minerals Matter Blush in Pink Petal 
For the eyebrows:
Youngblood Brow Artiste Palette in Dark
For the eyes:
M.A.C Prep and Prime Eye
M.A.C Silver, Black and Grey Eye Shadows Color Unknown (Must ask Ariella)
Smashbox Cream Eye Liner Palette in Cameo
Estee Lauder Magnascopic Mascara in Black
Ardell False Eye Lashes 
Quo Lash Adhesive 
For the lips:
L'Oreal Colour Riche Balm in Rose Elixir

I am so fortunate to know such a fantastic makeup artist AND have the pleasure of saying how great of a friend she is.  I will say though, that she gave my quite a bit of slack about the shape of my eyebrow brush because according to her "it's completely bent out of shape and useless..."  All in all, it was a fantastic day filled with makeup, a few hours of photos, multiple lingerie outfits and tons of laughter.  

Jan 27, 2012

DIY Beauty Fridays: Young-ify Your Eyes

Alright, so I know that "youngify" is not a word but it captures exactly what today's DIY tip is: Under-eye concerns and how to treat them.  I'm guessing that if you're like me your eye area can occasionally look blah.  Whether your concern is dark circles, crow's feet, puffiness or redness there is a homemade recipe that can help.

First you should know that the eye area is expecially thin and oh-so sensitive making it that much more important to take care of.  Because the area is so thin, it can flare up extremely quickly when you're stressed, tired, or eating bad-for-you-but-yummy food.  Instead of rushing out to buy the most expensive cure-all product on the market, check your pantry or fridge.  Here are four fabulous, inexpensive options to youngify your eyes!

1.  Chamomile, Green or Black Tea
I know I've mentioned this before but it does actually help ease redness and puffiness around the eye area.  Chamomile is a natural anti-inflammatory while green and black tea contain compounds called tannins.  (Oh, and caffeine)  Tannins have an astringent effect on the skin (so they aid in shrinking the pores) while caffeine constricts the blood vessels to reduce swelling.  Tip: Boil some water and steep two chamomile, green or black tea bags in the boiling water for about three minutes.  Remove from the water and place in fridge until cool.  Place one over each eye and relax for 15 minutes.

2.  Chilled Spoons 
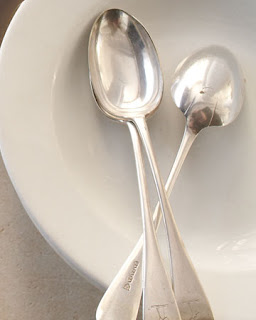
Yes, you heard me right.  Spoons, when chilled, also constricts the blood vessels which helps decrease the redness and puffiness in the eye area.  Tip: Place four metal spoons in a glass of very chilled water.  When cold, place on spoon on each eye, following the contour of the eye socket.  As the spoons begin to warm, swap them for the chilled spoons and replace the warm ones in the cool water.  Continue this process until the swelling subsides.

3.  Milk
This is a little trick I've been using for years and is especially fantastic when used before going out in the evening.  (And before you have makeup on.)  Cold milk also constricts the blood vessels which helps decrease puffiness and swelling.  The fat in milk also helps treat dry or irritated skin.  (I use skim milk and it still does the trick though.)  Tip: Pour some ice cold milk or cream in a small bowl and soak two cotton balls in the milk.  Squeeze out the excess from the cotton balls and put one over each eye.  As the cotton balls begin to warm, soak two more and repeat the process for up to 15 minutes.


4.  Cucumber Slices 
This is such a classic remedy but works to reduce puffiness, redness and and swelling.  Cucumber contains ascorbic acid (vitamin C) and caffeic acid, both of which are known to reduce swelling and puffiness.  Tip: Cut some cucumber (ensure that it's ice cold) and place one slice over each eye.  Lay back and relax with the cucumber on for 10 to 15 minutes.  Remove the slices and rinse your face with cool water.

Aren't these great tips?  Growing up in a household, and with a mom, that always expressed the importance of eye cream and eye care, these tips are something I use often.  I love that my eye area is almost completely crow's feet-free and hardly ever puffy, despite many late nights and alcoholic bevvies.  Try these out ladies!  I'm sure you can find one in this list that becomes your HG!

Happy weekend!

Jan 26, 2012

Cute Blog Award....For Me?

I always feel so honored when I'm nominated for a blog award.  Like, "wow, someone is actually remembering me and my little blog!"  It's a great feeling...

I was nominated for this adorable award by Holly from Ulta Is My Candy Store.  I randomly stumbled on Holly's and have been absorbing her well-written words and fun reviews for a few months now.  Just so you know, Holly knows her stuff about make-up and if you ever have a CoverGirl related question, she is your go-to.  Trust me.  So, if you haven't done so already, check out her blog!!

The rules of this award are as follows:
1.  Link back to the person that nominated you 
2.  Answer the award questions
3.  Tell something about yourself that you haven't told anyone on your blog yet
4.  Award as many blogs that you think are worthy of this award
5. Make sure to let those you nominated know about the award

And the award questions are:

1.  What is your go-to make-up brand?
Okay, this is a tough question.  For powder/foundation I would say Clinique or Estee Lauder.  Their products never make me break out and I love how long lasting their foundations are.  For eye shadow I would definitely pick Urban Decay.  Beautiful colors, long lasting formula and extremely pigmented tones.

2.  What was your favorite fashion trend of 2011?
Without a doubt I would say maxi dresses.  I think I ended up buying just over 8 of them and wore them all summer long.  Can't not wait to pull them out for Bali in the fall!!

3.  What is your favorite dessert?  
Mud Pie.  (Or as restaurants like to call it Mocha Khalua Ice Cream Pie).  It's delicious.

4.  Favorite color?
Red.  Need I say more?

5.  What is your middle name?
Marie 

6.  What's the last song you listened to?
Big Blue Wave by Hey Ocean.  (They're a Vancouver based band and if you haven't checked them out you definitely should.)

7.  Cats or Dogs?
Ah, tough question.  I love both equally.  Allan though, is allergic to cats and our condo doesn't allow for any pets so, alas, I'm pet-less.

Something you didn't know about me?  I am deathly afraid of flying.  I don't know what it is exactly because I'm not afraid of heights but the idea of flying makes me panic.  I am extremely nervous about our honeymoon to Bali in September because of the long flights....

I'm passing this award to the following fabulous ladies and fellow bloggers:
Mandy from MandysSecrets 
Bronwen from Rubyna
Marie from All Things Marie
Vintage at Vintage Makeup
Miss A from Beauty Boudoir

Congrats ladies!!

Jan 25, 2012

Product of the Week: Klorane Soothing Make-Up Remover Gel

My first encounter with a Klorane product was very dim.  I purchased their "award-winning" dry shampoo and despised the smell and feel of my hair after using it.  Needless to say, I typically walked past the Klorane section of the drugstore without so much as a glance.  But this weekend was different.

I ran out of eye make-up remover about three weeks ago and have been using baby shampoo instead.  As much as I like using this alternative, I find it's best if used in small doses and NOT as part of a daily routine.  (See, it dries out my skin ever so slightly and makes my under eyes slightly puffy.  In other words, not good!)  So, I went to London Drugs and after perusing the aisles, I stumbled on the new Klorane display advertising their eye make-up removers.  So, after some debate between liquid or gel, I snatched up the gel and made a dash to the cashier.

Once at home, I opened up the tube and was instantly met with a sweet, clean scent.  Usually most eye make-up removers have a very alcohol-based smell, one that irritates my eyes and even my face.  However, this one smelled very floral and quite soft.  Another HUGE plus for me was the packaging.  I love the tube!!!  It's so much easier to be able to squeeze out the perfect amount of product and have the lid close completely, making it extremely sanitary.

Klorane Soothing Make-up Remover Gel with Cornflower Water

Pros:
Beautiful light smell
Sanitary packaging
Easy to use 
Gel removes all make-up in a few swipes
Doesn't irritate my sensitive eyes or skin
Cornflower water known to soothe skin
Cons:
Price - $17 CAD

All in all, I would definitely repurchase this product. I love how my skin and eye area feels after using this product and the smell is so nice that I want to use it all the time!!  It's the price, though, that's getting me.  But, let's be honest, a great eye make-up remover IS necessary....

Have any of you ladies tried this product before?  What are your thoughts?

Jan 24, 2012

NOTD: NYC's Downtown

I've been on the hunt for a fabulous berry-toned polish for quite a while now.  I always find that berry tones seem to be either too red or too pink.  I was, though, pleasantly surprised to find a $2.99 polish that was almost the exact color I've been looking for.

Check this out.  It's an inexpensive polish by NYC called Downtown and I just love the mulberry tinge.  This color is such a nice change from the typical red, corals, pinks and even grays that I usually gravitate towards.  Plus, the fact that it was only $2.99 is a HUGE benefit.


Color shown with camera flash on
Have you ladies tried any of NYC's polishes before?  What are your thoughts on their colors?

Jan 23, 2012

How To Burn In a Tanning Bed

Yes, this is my "burn line".
On a whim, I decided to try tanning over the weekend.  Yes, strange, I know but with the photo shoot coming up in less than a week drastic measures needed to be taken.  After some driving around the neighborhood, I chose a very reputable-looking company and waltzed in.

The girl was very friendly and we talked for a good 15 minutes about tanning products, my inability to tan and tanning goggles.  I bought a package and was shown to a Super King Tanning Bed with Separate Face Tanner.  After applying the special tan accelerator, I rolled into the bed, closed the lid around me began "tanning".

It wasn't until 4 hours later that I realized my mistake.  I must have asked her for a booth that gives a really bad sunburn.  I mean, how else could I have gone tanning and ended up with a backside the color of a boiled lobster or legs that couldn't even bend anymore.  So, should you ever want to end up with a fabulous red skin tone, please follow these tips:

1.  Try and find a tanning salon that claims "no one ever burns in our beds" and actually truly believes it.  Your burn will be very red and excruciating if the girl making that claim is very young, pale and "always tans in this bed for 15 minutes or more."

2.  When given tan accelerator creams, always choose one that says "Dark Accelerator".  This cream will always turn your skin a nice red tinge particularly if you haven't been tanning in say, oh, 14 years.  Even if your gut says this cream is wrong, ignore that voice and listen to the salesperson.  They have your best interest at heart.  Ensure that you put this cream absolutely everywhere.  Your stomach, your chest, your kneecaps and even your bum because you won't be uneven this way.

3.  9 minutes (for a first timer) is the perfect amount of time to get a fabulous red glow.  Though most companies start their newbies off at 5 - 6 minutes (and work gradually up from there), pushing for 9 minutes guarantees you that crisp red glow you're seeking.

4.  Avoid the automatic turn-off button at all costs.  Remember, no ones burns in a tanning bed and even if you're skin feels slightly tingly, it's been said that this is a "normal" feeling.

5.  Always give yourself over two hours before showering.  This gives your burn ample time to spread through your body and attack all areas evenly.  And, when you do shower, use warm water.  This works best if you don't know you're burned...

There you have it ladies!  The perfect way to get sun burned while in a tanning salon.  Now, if you already have a tendency to tan when in the sun/bed well aren't you lucky?

PS - I should mention that this pic was taken on day 2 and not the day of the tan because the day of I was an absolute lobster, seriously.  And, I'm starting to peel, which is the worst part of a burn ever.  It better be gone by next Saturday....fingers crossed!

Jan 20, 2012

DIY Beauty Fridays: Anti-Aging Cantaloupe Mask

Friday couldn't have come soon enough this week, that's for sure.  Not only did we get a ton of snow (very odd for Vancouver), but it's also been bitterly cold and quite depressing.  This entire week has made my hair frizzy, my hands extremely dry, my skin look and feel non-glowy and my body tired.  (Wow, that's a lot of complaining...)

Needless to say, a pamper-me evening is completely required.  I can't wait to settle down with a great book, fantastic cup of tea, a warm bath and a clarifying face mask.  Plus, this one only contains two ingredients...

Anti-Aging Cantaloupe Face Mask

1/8 cup mashed (or blended) cantaloupe
1 TBSP warm honey (try and use organic if you can)

This is such an easy recipe.  Put your honey in a little glass bowl and soak the bottom in hot water until the honey is runny.  (Ha, that rhymed.)  Add in your cantaloupe and mix well.  Spread on cleansed face and relax with the mask on for about 15 - 20 minutes. (Sometimes, the cantaloupe will make this mixture extra runny which is why soaking in the tub might be nice.  If it is really runny before you spread it on your face add a bit more honey.)  Rinse off with war water and then cool water to close the pores.  Moisturize right away afterwards.

Why this works??  If cantaloupe is good enough for Cindy Crawford's skin care line, Meaningful Beauty, then we know it's good stuff.  Ha, no seriously, cantaloupe is loaded with sun-protecting betacarotene which keeps your skin looking young, feeling healthy and is supposedly known for its anticancer properties.  Cantaloupe is also known to have a powerful anti-aging property within the melon portion.  

If you love masks that are easy to make, smell great AND give great results right away then try this recipe out.  Plus, you'll also have a great dessert to bring with you in the tub!!  Happy masking ladies!

Jan 19, 2012

Pork Chops?

My mom sent me the cutest pics of a tiger and some piglets so check these out!!

In a zoo in California, a mother tiger gave birth to a rare set of triplet tiger cubs.  Unfortunately, due to complications in the pregnancy, the cubs were born prematurely and due to their tiny size they died shortly after birth.

The mother tiger, after recovering from the delivery, suddenly started to decline in health although physically she was fine.  The vets felt that the loss of her litter had caused the tigress to fall into a depression.  So, the doctor's decided that if the tigress could surrogate another mother's cubs that she would, perhaps, improve.

After checking with many other zoos across the county, the depressing news was that there were no tiger cubs of the right age to introduce to the mourning mother.  So, the vets tried something that had never been tried in a zoo environment before.

Sometimes a mother of one species will take on the care of a different species.  But the only orphans that could be found quickly were a litter of weanling pigs.  The zoo keepers and vets wrapped the piglets in tiger skin and placed the babies around the mother tiger.....Would they become pork chops or cubs???


How adorable is this?  I guess the mother tiger just needed a baby (or a few) to care for.  Animals are completely mind-blowing!

Jan 18, 2012

Davids Tea = Tuesday Tea Time

Aren't you loving my vintage cups and saucers?
Davids Tea = AMAZING.

I discovered this shop (which is directly across the street from me) last weekend and have been having tea fantasies ever since.  Allan took me in on Saturday and I purchased a couple teas to try as well as a tea pincher (see picture here).  We went home promptly and had a tea party, trying out the teas right away.  As soon as I sipped, I was in heaven.  Never have I ever tasted a tea so flavorful and pungent before!!

So the next day, I went to the tea shop again with my pal, Bronwen, and bought a kettle, a steeper and 8 different teas.  We, also, came home and had a tea party.  And THEN, last night Bronwen and I went out for dinner, she surprised me with three more teas and we had another tea party.  Check out our pics from Tuesday tea time!

My kitchen nook is, of course, filled with all the goodies one needs for the perfect tea party: two types of loose tea, agave nectar, milk, a clear steeper and my vintage teapot.  Can't forgot the cute lime green vintage tea cups and saucers...

Up close and personal....everyone, please meet my milk container, hot toboggan (tea), alpine punch (tea) as well as the agave nectar.  (If you aren't too familiar with this it's an all-natural sweetener.)

First tea up was hot toboggan.  It's a blend of green tea, apple, cinnamon and almonds.  It actually tastes like an apple cider but isn't as sweet OR high in sugar.  You can see that the loose tea's been added to the steeper and will float around until the tea has steeped long enough.  To access your tea, you then lift the steeper and place the bottom on a cup and press down.  The tea will automatically be released from the bottom of the steeper without any loose tea floating in your cup.  Brilliant!


All that's left once the tea has been removed is the loose tea.  Sometimes, depending on the tea type, you can even eat what's left over in the bottom....

Yay for piping hot tea on a very cold Vancouver evening.  If you haven't tried Davids Tea before OR have never been introduced to loose teas, GO GO GO NOW.  Not only are they full of flavor, but they are good for you too!  It's a great way to get your water per day and it's not filled with as much caffeine as coffee is.

Check it out ladies!

Jan 17, 2012

An Outrageous L'Oreal and Revlon Haul

A few days ago I walked into Shoppers Drug Mart about $65 richer than I was walking out.  And the funny thing about it was I only got a five items!!!

I'm sure I shared this tidbit already but I have a boudoir photoshoot coming up on January 28th.  Honestly, I don't think I've ever been as excited and nervous as I am about this.  For some reason, knowing that my body is about to be on display in a way it never has before has got me thinking about my pale skin, my extra 7 pounds and my facial expressions.  After I kick the little negatives out of my head, I realize how much fun I'm going to have AND how much Allan is going to enjoy them.  Plus, I get to buy some great cosmetics, hence my Shoppers run.

I seemed to gravitate towards Revlon and L'Oreal products this time and ended up selecting (from left to right) L'Oreal Magic Lumi Light Infusing Primer, L'Oreal Color Riche Balm in Rose Elixir, Revlon Photoready Airbrush Mousse Makeup and L'Oreal Magic Lumi Concealer.

First up is the primer which is such a fantastic product.  I love anything that makes my skin glow and this really does the trick.  Not only do I glow but my skin feels smooth and it doesn't get oily during the day.  I have been using this since I bought it and am constantly getting compliments on my "dewy" looking skin.

Look how dewy my hand looks after the primer's rubbed in.

 Next is the lip balm.  Typically, I'm not a balm wearer unless my lips are horribly chapped but I liked this one because it will be perfect with all the lacy, feminine outfits I'll be photographed in and it keeps my lips extremely moisturized.

See how nice and pink it is on my wrist?

Thirdly is the mousse makeup.  I have used a mousse before (Sally Hansen) and wasn't the biggest fan.  I found the coverage to be too light and the product itself was not quite fair enough for my pastey pale skin tone. However, this new Revlon product was definitely created with the fair gals in mind. (Plus having Emma Stone as the spokesperson isn't too bad either.)  The cosmetician recommended it and said it will be great in photos as it's designed to make your skin look airbrushed.

Love this picture.  Not only can you see how perfect
the mousse matches my skin tone but specks of the light infusing primer is also poking through.
Last but not least, the light infusing concealer.  Just so you all know, a concealer that contains light-infusing particles is perfect for dark circles.  For some reason, it makes the sun bounce off your eyes and creates a more youthful appearance.  Having said that, it matches my tone well and I'm looking forward to seeing how it holds up in a camera lens.

Did I mention that my fab friend, Ariella (a makeup artist) is going to be doing my makeup?  Sigh, I can not wait for this to go down.  Just a couple more weeks.

Ladies, have you used any of these products before?  What are your thoughts?

Jan 16, 2012

NOTD: Wet N Wild's Grays Anatomy

I was recently perusing a blog I follow named Loodie Loodie Loodie and came across the most gorgeous nail polish color.  Never before have I seen a polish quite like the one she blogged about.  In the light it seemed purple and then POOF the light would hit it differently and it'd look almost green.  After seeing this awesome chameleon polish, I knew it had to be mine.

I was in the states on Wednesday evening picking up a package and decided to pop in Rite-Aid.  While browsing through the cosmetics aisles, I stumbled on a Wet N Wild polish color that reminded me of the polish from Loodie's blog.  Soooo I bought it of course.  This is, though, where the similarities end...

As much as I love the color, it's not as color changing as the polish from Loodie's blog.  Also, I do think it's quite funny that they named the polish Gray's Anatomy when the color looks more purple-ish (to me).  I do, though, love how quickly the polish dries and how thick the brush is.  A thicker brush makes for very even nail coverage.

For a polish that cost only $2 I do have to say that it's worth it.  I would, though, really love to find the chameleon polish from that other blog.  I guess I'll have to keep searching....

PS - I have asked this many times before BUT I need your help.  Can someone recommend a fabulous top coat?  One that doesn't cause your nails to chip after only a day???

Jan 13, 2012

DIY Beauty Fridays: Hangnails and How to Prevent Them

Typically I create, test and write my own posts for Beauty Fridays but this week is a bit different.  Yes, there is a recipe at the bottom but I found this fantastic article that I had to share with you.
While at work this afternoon, I was picking at a GIANT hangnail on my thumb (which eventually came off AND has left a huge red irritated area) and it got me thinking about hangnail prevention and how important it is.  Especially with the weather being drier, our hands, and nails, are taking a beating.  So, in non-Red Lip Gloss fashion, here are some fantastic (borrowed) tips to prevent hangnails.  Thanks so much CLUTCH Magazine!!!
1. Juice them up. Keep your nail beds moisturized. Use cuticle oil or cream to keep the skin around the nails supple. Dry nails are the first things that lead to hangnails.
2. Don’t pick at your cuticles! It’s a habit that most women have–even more so than nail biting–and makes the little boogers pop up.
3. Nick them while their short.Instead of picking at your cuticles, snip them off as soon as you see them with a good pair of nail scissors. This keeps them from growing longer and becoming more painful.
4. Use your resources. A really good moisturizer for your cuticles is petroleum jelly. The fats in the product penetrate through the layers in your skin while the jelly itself creates a film preventing air from drying out the skin.
5. Nighty-night. The best time to pamper cuticles is at nighttime. Massaging a little bit of lip-balm into your nail beds will keep them moisturized and protected throughout the night.
6. Healing power. A natural element to heal hangnails quickly is by tapping into nutrients. Dropping vitamin E oil on nail beds after a fresh clip is one of the best ways to prevent hangnails from appearing.
7. Watch the solution! Avoid acetone-based nail polish remover because it dries out hands and nails, making hangnails highly susceptible.
8. Push it. Make sure you have your cuticles pushed back often with an orange stick or cuticle tool.
9. Keep ‘em groomed. Trim your nails regularly so they appear and stay neat at all sides and angles. Do this by treating yourself to regular manicures.
10. Kick a bad habit. Try your hardest to fight the urge to chew or bite on nails. Doing so aggravates the nail bed and causes hangnails to bleed.
Wow, I can definitely see what I need to incorporate into my nail routine.  These tips also explain the importance of cuticle oil/softener.  On that note, here's a quick recipe to make your own cuticle oil.
Prick a liquid vitamin E capsule with a clean, disinfected pin.  Squeeze the contents of the capsule into a little bowl and add 1 TBSP of olive oil.  (Again, I always use extra virgin olive oil).  Dip each finger into the mixture and let it sit on the nail beds for a minute or two.  After they've finished soaking, begin pushing your cuticles back.  Once done, rub the remaining mixture on your hands and fingers for additional moisture.
There you have it ladies!  A quick cuticle softener recipe and some fab tips to prevent hangnails.  Hopefully, I'll learn from my own mistakes and STOP PICKING those pesky little things..
Happy weekend!

 photo copyright.jpg
envye template.